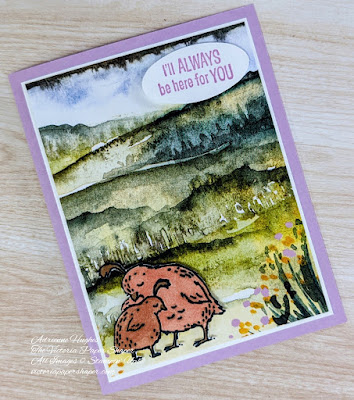
Monday 29 August 2022

Monday's Easy Fun Fold - The Hidden Sentiment Card

Hi Everyone and Welcome!!

Today's Facebook Live featured this card. I know some of you prefer or need written instruction so here you are.


Start with a card base 4 1/4" x 11". Score at 2 1/2", 3 3/4", 6 3/4" and 8 1/4". Your also need two 4" squares of contrasting cardstock. Next you'll need two 3 7/8" squares of DSP (our patterned paper.) It can be directional and you can use either the same or different patterns. If your card base is coloured, you'll need to add a 2 1/2" x 4" piece of vanilla or white, where you'll write your personal message. 

Put your card base in front of you, in landscape with the 8 1/4" score (2 3/4" to the edge) on the right. Fold the base over on the 8 1/4" score line, burnish. At the 6 3/4" score line fold back to the left, burnish. At the 3 3/4" line fold over to the right, burnish. And finally at the 2 1/2" fold back to the left and burnish. It will look like a zigzag or a set of stairs.

Attach your DSPs to the cardstock layer squares. Put the card base into portrait. Attach adhesive to only to top half of the back of the cardstock layer going on the front panel. Repeat for the middle panel, again with adhesive only on the top half. If you're using a white/vanilla piece, attach it to the small bottom panel of the card base. 

The rest is all decorating. The only thing to keep in mind is that for the surprise - hidden element of the card to word (the middle bit), you need to make sure it doesn't show. You have about 2 1/2" to work with. Test it before attaching it. 

Remember Sale-a-bration (SAB) ends August 31, 2022. For every 60 spend, you get to choose a FREE SAB item. My store is here.

If you have any questions about this project, Stampin' Up! or what I do, feel free to message me. Let me know if you want to be added to my monthly email newsletter. You can also find me on Instagram and Facebook.

We'll see you next time. Thank for taking the time to come by.

Cheers,

Adrienne


Saturday 20 August 2022

Die Cut Thanks

Hello and Welcome!

Sometimes it's fun to create a cut just from die cuts or punches - so no stamping.

I used the Amazing Thanks, Sentiment Silhouettes and Grove Dies to create my card. They were put on top of a lightly ink splattered piece of white, embossed with the Brick & Mortar Embossing Folder.


If you have any questions about this project, Stampin' Up! or what I do, feel free to message me. Let me know if you want to be added to my monthly email newsletter. You can also find me on Instagram and Facebook.

We'll see you next time. Thank for taking the time to come by.

Cheers,

Adrienne


Monday 15 August 2022

Monday's Easy-ish Fun Fold

Hello All and Welcome Back!

I hope you all had a great weekend. It's so funny - mine flew by and I seriously don't remember what I did. Have you ever had a weekend like that? 

It's another sunshiny day here in Victoria, BC. I'm hoping to get out into the gardens for some deadheading before it gets too hot. Or maybe I'll just stay in my craft room.

This blog is based on my Facebook Live from this morning. During the month of August I'm featuring a new fun fold every Monday. I'm trying to keep them on the easier side for all my newer stampers. Many thanks to my friend, Shel, for showing me this fold.


Here is what you'll need to make this card:

CARDSTOCK:

  • 5 ½” x 8 ½” cardbase, scored in landscape at 2 ⅛” and 4 ¼” 

  • 2 ½” x 4” scored in landscape at 1”, 2” & 3”

  • 2” square

  • TWO 1 ⅞” squares


DSP (Use a non-directional, smaller pattern):

  • 4” x 5 ¼”

  • TWO 1 ⅞” x 5 ¼”

  • 1 ¾” square

  • TWO 1 ⅝” squares


MISC:

  • Smallish sentiment(s) ¾” x 1 ½” ish on one side & larger on the other

  • Decorative stamps, die cuts a/o punches that will fit onto the small squares

  • Any embellishments you wish to add


Start of by burnishing scores of the card base into a Z-fold. Fold the the first score line into the opposite direction of the middle score line (which is folded like a standard card.) So it should look lie a "Z" from the bottom. Burnish the score lines of the 2 1/2 x 4 "magic" piece, all in the same direction and set it aside. 


Using your favourite adhesive, attach the DSP to the inside pieces of the card base and squares. 


Your "magic" piece should be curved like a "c" or "u". Put adhesive on one of the outside edges, up to the first score line, of this piece. Turn your card into portrait position and centre the "magic" piece on the DSP, with the adhesive edge facing down, up against the scoreline. Try to keep it in the middle. (The adhesive is on the other side of the green outlined area.) Then folding this piece in half, apply adhesive to the piece closest to the score. Close the card to secure the adhesive. (The adhesive is on the purple highlighted area.)


Attach larger diamond inside to the front panel of the "magic" piece, near the score line. Be sure to only apply adhesive on the piece that is attaching. You don't want the rest to stick to your card. Attach smaller diamonds to the front left panel, with only the left half attached. Again, be sure to watch those pesky lines. 


Stamp and cut out any bits. Decorate and you're done! Many thanks to my friend, Shel, for showing me this lovely fold. 


There are only a couple weeks left in Sale-a-bration. For every 60 you spend* you get to pick an item for FREE. This is a fabulous time to try some new things and stock up on your basics. Here is a link to my Store for all your paper crafting needs. 


I used the Nothing's Better Than stamp set and the Love You More Dies to create the first card. The DSP comes from the fabulous Celebrate Everything Host pack. Tip: To create the ice cubes, highlight them with the Fine-Tip Glue Pen. The Tahitian Tide card was creating with the Brilliant Wings Dies and the Charming Sentiment Bundle. Those DSPs come from the 2022-2024 In Color DSP and 2022-2024 In Color Glimmer packs.


Thank you so much to those of you who make the time to watch my Live and visit here. If you have any questions about this project, card making, Stampin' Up! or pretty much anything, please message me. Let me know if you want to be added to my monthly newsletter. You can also find me on Instagram and Facebook .

Have a fabulous week. Thank you for coming by.

Cheers,

Adrienne

*Before shipping & taxes. There are also Level 2 items, which you get for free with a 120 spend. All Sale-a-bration items are while supplies last.


Thursday 11 August 2022

SIt Stay Relax

Hello everyone & welcome back!

Today's blog was for a challenge to create cards featuring animals. Of course I had to do a cat card (just don't tell the dog.) Here is what I created. I kind of want this chair in real life now!

I used the adorable Sit Stay Relax Host stamp set. The background comes from the Drybrush background stamp. To create the ombre look I stamped approx 1/3 of the stamp with each colour, light to dark. The die cut circle and sentiment strip come from the Stitched Shapes Dies and the colourful pieces come from the Bough punch. All the colouring was done with my Stampin' Write Markers.

If you have any questions about this project, Stampin' Up! or what I do, feel free to message me. Let me know if you want to be added to my monthly email newsletter. You can also find me on Instagram and Facebook.

We'll see you next time. Thank for taking the time to come by.

Cheers,

Adrienne


Monday 8 August 2022

Monday's Easy Fun Fold - Twisted Easel

Hi Everyone and Welcome Back!

I hope you had a fabulous weekend. Mine was busy but fun. We said Bon Voyage to one of my nephews. Today he's heading off to Oslo, Norway for a university term. My daughter spent a year at the University of Edinburgh. It was an incredible experience for her and she made life long friends. In fact, that's where she is as we speak, back in Scotland visiting all her friends from uni. I wish the same for my nephew. 

Today on my Facebook Live, I demonstrated another fun fold. This one is just a little trickier than last week's. Meet my my Twisted Easel!

Start with a 4 1/4" x 8 1/2" piece of cardstock, scored at 4 1/4" and then diagonally from the top right to the centre score line you just made. Burnish the score lines at set aside.

Make TWO of each of the following: 4" squares of cardstock; 3 7/8" squares of cardstock; 3 3/4" DSP (patterned paper) squares of cardstock; and 2 3/4 squares of white or vanilla.

If you're planning on stamping the small white squares do that now. Layer and attach the 3 3/4 DSP piece onto the 3 7/8  square and then this onto the 4" square. Add the small white squares to the top. One of your squares is going on the front and the other "inside" the card but both will show. With the card open and the fold on the left (folding in towards the card), attach one square to the inside right unscored panel. When you attach the other layered piece to the front left card base, be sure to only put adhesive diagonally on the back of the half that's attaching to the card. Tip: To make sure I don't get confused, I'll mark the back it or put a post it on the piece before applying my adhesive. You could also put adhesive on the card base, below the diagonal score line (on the front) instead. Just be sure to leave a bit of a margin in case you have to adjust the panel you're attaching.


You can now decorate the front and inside bottom piece with at die cuts, etc. The only must have is a piece on the inside bottom that can be raised with Dimensionals. Tip: I recommend TWO layers of Dimensionals. Stick down one and then put another dimensional directly on top of it. I also suggest making sure the folded piece is past the halfway mark. If you try to put it lower (towards the bottom right, you may not have enough resistance for it to stay in place.)  

Our great Sale-a-bration is on until the end of August!. For every 60 spent* you get to choose an item for FREE. This is a great time to stock up on basics and try some new things. One this one, I used the Flowers of Friendship Stamp Set, the Flowers & Leaves Punch, the Charming Sentiments Bundle with the Rings of Love DSP (Sale-A-Bration item.) On the Facebook Live, I used the He's All That Suite. Here is a link to my Store for all your paper crafting needs.

Many thanks to those of you who took the time for watch my Live and visit here. If you have any questions about this project, card making or Stampin' Up!, please message me. Let me know if you want to be added to my monthly email newsletter. You can also find me on Instagram and Facebook .

We'll see you next Monday. Have a fabulous week. Thank you for coming by.

Cheers,

Adrienne

*Before shipping & taxes. There are also Level 2 items, which you get for free with a 120 spend. All Sale-a-bration items are while supplies last.


Friday 5 August 2022

A Tag Card

Hello everyone & welcome back!

Today's blog is for the Global Design Project, #GDP354. This week's challenge was to do something with a tag(s). Here is what I created.

I used the fun Alphabet Bundle for my "hope" sentiment. The Designer Series Papers come from the Lights Aglow package, which feature gold highlights. The additional layers are Cherry Cobbler Cardstock and Gold Foil. The Tailor Made Tags. Tip: When putting the tags onto the card front, attach the outer two first. This makes it easier to centre the two in the middle. 

If you have any questions about this project, Stampin' Up! or what I do, feel free to message me. Let me know if you want to be added to my monthly email newsletter. You can also find me on Instagram and Facebook.

We'll see you next time. Thank for taking the time to come by.

Cheers,

Adrienne

Hope lies in dreams, in imagination, and in the courage of those who dare to make dreams into reality. – Jonas Salk

Monday 1 August 2022

Monday's Easy Fun Fold - Double Z

Hi Everyone and Welcome!

It's a long weekend here and thankfully the end of our latest heat wave. This morning, when I was out walking the animals, I ran into a neighbour. She commented that it felt a little cooler. I said it was "only" going up to 25 or 30 with the humidity. She laughed at the only. Our spot on the island doesn't usually get these smoking hot temperatures.

Every month I have a different theme for my Facebook Lives. This month it's fun folds. Since fun folds are sometimes a little tricky, I'm going to provide written instruction here for each of them. That said, this one is fairly easy and a great first fun fold for all of our new stampers. 

This morning's Facebook Live featured the Double Z fold. I used the adorable Storybook Gnomes DSP and the Hope & Peace Stamp Set.

You will need the following supplies: a card base 4 1/4 x 11, scored at 5 1/2; a layer of cardstock (of a different colour - this one is going right next to your DSP) 4 x 10 1/2, scored at 5 1/4 and 2 5/8; DSP piece of 5 x 3 3/4 and 2 3/8 x 3 3/4. They can be the same or different patterns. If your DSP is directional, the 3 3/4 is the landscape measurement.

In order to complete your card, you'll need to grab a sentiment stamp, ink and any decorations you want to add (die cuts, punched images, ribbons, etc.) 

Fold your card base along the score line and burnish. For you next layer, fold at the 5 1/4 score and then fold the 2 5/8 score in the opposite direction. Burnish your score lines. 

Attach the large piece of DSP to the inside of the 5 1/4 x 10 1/2 piece (on the unscored side). Next you'll attach the small piece of DSP to the front bottom 2 5/8 piece of this layer. Both pieces of DSP should be facing the same direction. Attach this to the front of your card base. Now you're ready to attach your sentiment and any other bits. Be careful not to put any adhesive on pieces that hang over the edge of the front fold (dimensionals are only on the bottom half of my sentiment strip.


And there you have it - a fun fold!

Our great Sale-a-bration is on until the end of August!. For every 60 spent* you get to choose an item for FREE. This is a great time to stock up on basics and try some new things.

Many thanks to those of you who took the time for watch my Live. If you have any questions about this project, card making or Stampin' Up!, please message me. Let me know if you want to be added to my monthly email newsletter. You can also find me on Instagram and Facebook .

We'll see you next Monday. Have a fabulous week. Thank you for coming by.

Cheers,

Adrienne

*Before shipping & taxes. There are also Level 2 items, which you get for free with a 120 spend. All Sale-a-bration items are while supplies last.


Wednesday 20 July 2022

Emboss Resist Watercolouring

Hi Everyone and Happy Wednesday!

Welcome back to my blog. 

Thank you so much for all the positive messages about my latest watercolour technique videos (my July 18th Facebook Live and IG Reel). A few of you have asked about written directions, which I'm happy to provide in today's blog.

Here is the completed card and a couple extra sample trees. 

The same colours and order of ink were used each time. If your brush is fairly wet, the colours will be lighter (the tree right next to the card.) If you don't clean your brush in between layers, the colours will be less distinct (the tree on the bottom left). I've never coloured anything so fast as I did in that Reel - good thing I love a challenge. This is actually why the brush wasn't cleaned in between colours.😂

You'll need the following supplies: Fluid 100 Watercolor Paper, VersaMark, White Embossing Power, a Heat Tool, Stampin' Inks (the little refill bottles) and our Water Painters. You'll also need a stamp set (I'm using the new Christmas Lights Bundle) and some paper towels. 

Using VersaMark, Stamp your image on the watercolour paper. Since this paper has texture, you need to apply a bit of pressure to ensure the VersaMark transfers to the paper. Here's where the Stamparatus can be your friend - if any areas are missed, you can just pop your paper back in and stamp again. 

Sprinkle white embossing powder over your image and heat emboss it. I am loving the new Embossing Additions Tool Kit. You can hold the paper with your ceramic tipped tweezers, shake the excess powder into the tray and brush it back into the jar. No muss no fuss.

After heat embossing, I used the die from the Christmas Lights Bundle to cut out the trees. Put 2-3 drops of ink for each colour you're using on an acrylic block. Put some water into the the largest Water Painter and squeeze the bulb to bring the water to the tip. Use your paper towel to dab off any excess.

Tips: For a more natural look, follow the curve of the tree - so the paint strokes are starting higher, then down down and then back up. If you want distinct colours, remember to clean your brush when changing colours. And more water = less intense colours. Experiment on scrap paper. 

Starting with the lightest colour, Coastal Cabana, dip it in the ink and sweep across the tree, just under the star. Dip it in the ink again and sweep near the middle of the tree, down about 1" form the first one. Dip it again an sweep across the tree about 1" from the middle one. With your Bermuda Bay, repeat this underneath and slightly over lapping the each Coast Cabana stripe. Finally, with your Pacific Point, paint the star and fill in the 3 remaining pieces.

I put my tree on an piece of embossed white cardstock (Wintry 3D Embossing Folder) and used some Silver Foil trim on each side. This went on top of a Bermuda Bay card base. I added a sentiment from the Brightest Glow Stamp Set and cut it out with the Stitched Rectangles Dies. To finish it off, I added a few Rhinestone Basic Jewels

Right now, until the end of August, our fabulous Sale-a-bration continues. For every 60 spent* you get to choose an item for FREE. This is a great time to stock up on basics and try some new things.

If you need any help ordering, have any questions about Stampin' Up! products or this card, feel free to message me. Let me know if you want to be added to my monthly email newsletter. You can also find me on Instagram and Facebook where I spend way too much time.

We'll see you next time. Thank for coming by.

Cheers,

Adrienne

*Before shipping & taxes. There are also Level 2 items, which you get for free with a 120 spend. All Sale-a-bration items are while supplies last.


Tuesday 12 July 2022

Circle, circles & more circles


Hello and Welcome!

I created this card for this weeks's Global Design Project #351. The theme was "shapes." Taking my inspiration from a current sand art installation in Tofino, BC (on the same island as me), I went with something a little abstract and out of the box.

The Crumb Cake layer was embossed with the Timber Embossing Folder. Then, going largest to smallest, the circles were embossed with the splatters from the Stripes & Splatters, Painted Texture and Fern Embossing Folders. The sentiment came from the Friends Are Like Seashells. All the circles were just eyeballed, not measured. You could absolutely measure or use a template to be more precise.


If you have any questions about Stampin' Up! products or this card, feel free to message me. Let me know if you want to be added to my monthly email newsletter. You can also find me on Instagram and Facebook.

See you next time. Thank you for coming by.

Cheers,

Adrienne

Wednesday 6 July 2022

Summer Flowers Black & White


Hello and Happy Wednesday!

I've always like Wednesdays. It's half way through the work week and most of us are getting exited for the weekend. 

I created today's card for the Global Design Project. People all over the world are given the same card sketch/layout or colour combination. And then we all make cards! It's a great way to get inspired and have you create outside your comfort zone. 

Using the large Artistic Dies, I cut out the flowers and attached them to a circle of the Vellum Layering Designs, which was over a circle of white. The edges of the die cut are loose and I curled them up a little with my fingers. This piece was attached to the card front with Stampin' Dimensionals. The sentiment came from the Charming Sentiments Bundle and the background from the Stitched Greenery Die.

If you have any questions about Stampin' Up! products or this particular card, feel free to message me. Let me know if you want to be added to my monthly email newsletter. You can also find me on Instagram and Facebook.

We'll see you next time. Thank for coming by.

Cheers,

Adrienne

Saturday 25 June 2022

Lilacs from Wisterias

Hi all and welcome back,

When I first saw the lovely Wisteria Bundle in the new Annual Catalogue, I immediately thought of lilacs. Growing up in Alberta, they were everywhere and I often picked them for my Mum. To this day, I find their scent magical and almost intoxicating.

It turns out they aren't native to North America. It's believed they were brought over, from Europe, by homesick settlers. A cool thing about lilacs (and maybe this is why there were so many around homesteads) is farmers used them as an indicator plant and would harvest their fields depending on what the lilacs were doing. How wild is that?

This beautiful background was created with the Fern 3D Embossing Folder. The Happiness Abounds Stamp Set provided the sentiment and the Stylish Shapes Dies, the sentiment strip. To create more visual interest, cut an extra sentiment strip in a contrasting colour. Glue it behind the sentiment and slightly offset it. 

Here is my lilac card, made possible by wisterias. 

If you have any questions about Stampin' Up! products or this card, feel free to message me. Let me know if you want to be added to my monthly email newsletter. You can also find me on Instagram and Facebook.

We'll see you next time. Thank for coming by.

Cheers,

Adrienne

The breath of the enchanted wind mingles the fresh scent of the lilacs with the fragrance of the past. - Marcel Proust


Friday 24 June 2022

Campology & A Long Lost T-shirt

Hi Everyone!

Today I'm going to show you a few cards from the lovely Campology Stamp Set. As a demonstrator, I buy stamp sets for various reasons. Sometimes I just love them and have to have them. Other times, I will decide a certain set may work well in a class or appeal to my customers. And then there's this one. I bought it to make ONE card, based on a 25 year old memory.   

Since my brother lived in Victoria, I often visited before I moved here. During one of these visits, I was downtown by myself. I walked past a shop that had a t-shirt in the window. It was a cartoon-like drawing of two pup tents perched precariously close to the edge of a cliff. It said, "Two Tense." I thought it was hysterical. Why I didn't buy it then and there, I don't remember. But I went back the next day. I searched and searched and couldn't find it. Downtown Victoria had a LOT of shops with t-shirts in their windows. In fact, I looked for it over several years. I never found it and eventually the memory just settled into a corner of my mind. When I saw this stamp set in the catalogue, I knew what I had to do.

In addition to the Campology set, I used the Mountain Air Stamp Set and the Stacked Stone Stamp Set. The colouring was made possible with the fabulous Blending Brushes.

The inspiration for my second card came after a ferry ride. When you go from Victoria (on Vancouver Island) to Vancouver (on the mainland) you pass through the Gulf Islands. In addition to the large islands, there are a few tiny uninhabited ones. I envisioned camping on one of the main islands and what that view would look like at dusk. Fussy cutting that lantern - oof! The latern's glow was achieved by adding some of the Fine-tip Glue Pen to the light after I'd coloured it with my Blends.

My third card was made this week. I wanted to show that Campology can be used without Blending Brushes. One of the easiest ways of making a card look fabulous, is to stamp directly onto the DSP (Designer Series Paper.) This new paper, which reminded me of the night sky, is in the Rings of Love DSP pack. The ridiculously adorable camper is from the new Tree Lot Dies. Both of these are Sale-a-bration items, which means you can earn them for FREE.* I used In Color DSP & In Color Glimmer Paper to create the camper.

If you have any questions about Stampin' Up! products or either of these projects, just message me. Let me know if you want to be added to my monthly email newsletter. You can also find me on Instagram and Facebook.

See you next time. Thank you for making the time to visit and read.

Cheers,

Adrienne

There is no Wi-Fi in the mountains, but you'll find no better connection. - Anon 

*Each of these Sale-a-bration (SAB) items are free with a 60 (for the DSP)  & 120 (for the Dies) purchase (before s/h & tax) starting July 1st. SAB runs until August 31st. Items are available while supplies last. 

Thursday 23 June 2022

Ombre Window Card

Hello happy people and welcome!

Normally I make at least one card/project a day. Although I see so much inspiration around me sometimes I do find myself wondering what to make next. Design/Creative Challenges are great for inspiration. They often get one thinking outside the box - we can all get stuck. I encourage you to look at these "challenges" as inspiration and give them a go. 

Today's creation came to be during a Team Technique Challenge. Everyone in our group used the same "Floating Strip" technique, with dozens of different stamp sets, all getting great results. I used the Happiness Abounds Bundle for mine.


The In Color Glimmer Paper is attached to a Window Sheet. Since each strip needed to line up and be equally(ish) spaced, I used our Multipurpose Liquid Glue. (Our Grid Paper is very helpful for projects like this one.) The window sheet was attached to the card front with Mini Stampin' Dimensionals (I did make sure my strips were going to be wide enough for them to fit.)

To decorate the card, I added a stamped die cut flower and sentiment from the Happiness Abounds Bundle and some Simply Elegant Trim. The sentiment strip was created with the Stylish Shapes Dies.

If you have any questions about Stampin' Up! products or any of these projects, please message me. Let me know if you want to be added to my monthly email newsletter. You can also find me on Instagram and Facebook.

See you next time. Thank you for taking the time to visit.

Cheers,

Adrienne

Inspiration exits, but it has to find you working. - Pablo Picasso


Wednesday 22 June 2022

Cherry Blossoms & Deers

Hi Everyone!

Welcome back to my blog. Today's card was created earlier this spring. I am blessed to live in Victoria, on Vancouver Island, where the cherry blossoms are incredibly plentiful, along with deer. (And the cherry blossoms are definitely the more popular of the two, at least with the locals. 🤣)

Once in a while I like to create a card without a sentiment and these dies are perfect for that. To recreate this look just cut out three foregrounds with the die, one in each colour (you could also switch up the colours for the other seasons.) Set aside the Soft Suede (brown) one for trees. On the Pear Pizzazz (green) one, cut it in half, on the short edges - I did this unevenly to try and make it look more natural. Cut away the trees. With the Blushing Bride (pink) piece, cut away the trees. Glue all three layers together. I recommend our liquid glue for this because you get that moment o forgiveness to adjust. Use Dimensionals to attach this piece to the card base. Cut out your deer. Mine are white because I wanted them to be the focal point of the card. I have the doe's head peaking around the tree (she is otherwise glue to the card base. The fawn is glued to the grass and the attached to the base with Dimensionals.

If you have any questions about Stampin' Up! products or this card, please message me. Let me know if you want to be added to my monthly email newsletter. You can also find me on Instagram and Facebook.

We'll see you next time. Thank you so much for making the time to come by.

Cheers,

Adrienne

Flowers enshrine my heart between their petals; that’s why my heartbeats love them so much. - Munia Khan


Tuesday 21 June 2022

Gentle Waves meets the Tulip Builder Punch

Hi all and welcome back!

A quick PSA and then onto our project. Today, Tuesday June 21, 2002 is FREE shipping day (SU is on Mountain Time) on all orders over $100. Shop here or message me before 10:00pm to place your order.

I love finding unexpected used for Stampin' Up! products. (You may have seen some of my Instagram Reels called, "This is That." Those clips explore some of my discoveries.) This was one of my favourite findings. Since this lovely background stamp retires June 30th, I thought I'd write about it too. In this card the Gentle Waves Stamp meets the Tulip Builder Punch.

A few years ago I had some friends visiting from Germany & Switzerland and wanted to show them the island. We drove up along the east side of the coast, with a memorable stop in Port McNeill, where we went whale watching. There were the usual suspects, nothing too exciting for me but my guests were happy. Then the boat stopped and insanely putrid smell descended on us. It was so strong you could taste it. Our captain excitedly announced, "Sometimes we smell them before we see them, We have a humpback!"

If you've never seen one, they are HUGE. She was probably 50 feet long, so it's kind of like having a 5 story building pulling up beside you...in what now felt like a teeny tiny inadequate boat. She turned to leave and then the most iconic moment came, the tail fluke...that moment when their tail pops out of the water before they dive back into the depths of the ocean. (Somewhere I have a photograph.) This incredible experience was the inspiration for my card. 


Starting with the lightest colour, I stamped the Balmy Blue onto the Gentle Waves Stamp. The middle was done in Pacific Point and the foreground in Night of  Navy. Since I have small hands, I find using the Stamparatus easier than the F Block. Next, I punched out two "leafs" from the Waves of the Ocean DSP (which I'm said to say has sold out)*, with the now multipurpose Tulip Builder Punch. Make sure to turn over the DSP for the second one. If you are interested in a retired or unavailable products, just message me for alternatives. :)

If you have any questions about Stampin' Up! products or this card, please feel free to message me and let me know if you want to be added to my monthly email newsletter. You can also find me on Instagram and Facebook.

We'll see you next time. Thank for coming by.

Cheers,

Adrienne

The ocean is a might harmonist - William Wordsworth

*If you're looking for something I've used that is no long available, just message me and I'll suggest an alternative. :)


Monday 20 June 2022

Nuts & Bolts Projects

Hello wonderful people!

Earlier this year, I had the honour of being a Creative Ambassador for a month. I got to choose a stamp set and once a week had to post a project featuring the set. I felt like a kid in a candy store. It was so much fun coming up with different ideas and sharing them with my fellow demonstrators (a team of about 70.) I chose the Nuts & Bolts Stamp Set because it was one I wouldn't normally buy. The idea of creating with something I wasn't gravitating towards was very appealing - I love me a challenge!

For the first two weeks, I designed 3 cards for avid, casual and beginner stampers. This wasn't a requirement but I knew we had a lot of new stampers in this team and I wanted to make sure they felt included. Here's the first week's selection:


For the third week, in addition to featuring a decorated Ombre Gift Bag (retired) and Mini Jam Jar (retired), I showed everyone a hexagonal box I had designed. They were all full of yummy selection of Nuts & Bolts... which of course I had to eat because we weren't meeting in person yet.

When the last week arrived, I decided to have some serious fun. I will occasionally create my own sentiments, trying to be punny or making Dad jokes. I'm a HUGE Dr Who fan and this is what the first one references.


Much to my surprise, I loved this stamp set. It let me rediscover the playful side of stamping. It showed me it wasn't just for kids. It retires June 30th so contact me before month end for your order.

If you have any questions about Stampin' Up! products or these projects, just message me and let me know if you want to be added to my monthly email newsletter. You can also find me on Instagram and Facebook.

We'll see you next time. Thank you so much for making the time to visit.

Cheers,

Adrienne

The real problem is not whether machines think but whether men do. - B.F. Skinner 

If you see something you like that's retired, just let me know. I can let you know what's similar and current. One of the things I love about Stampin' Up! is how they change their selection of products. 


Sunday 19 June 2022

Happy Father's Day!!


Hello and Welcome,

My Dad was an amazing man. Looking back, I realize how incredibly cool he really was. He had several different careers, from a liaison officer with the federal government, to helping immigrants, to teaching and more. He was a natural mediator, a formidable public speaker and an incredibly talented musician.

He taught me kindness and gratitude. He's the one who showed me how to listen. I can thank my Dad for my love and passion for all kinds of music. And for the fact that I collect instruments I can barely play. I can also thank him for my nose - but we're not going to talk about that.😂

I love you and miss you every day, Dad. Thank you for all you did.

That's me in the middle, with my brother, sister & Dad, at the Zoo.
Enjoying the garden.
At my niece's wedding

Dad had great fashion sense and pairing the Tahitian Tide with the Early Espresso made me think of him. This card was created with the He's the Man Suite Collection. It's part of a series I made for a collaboration with over 60 other Demonstrators from all over the world. We're working together, sharing our designs and ideas, to help each other's businesses. If you'd like to become part of this incredible community, contact me or join here. 

I'm not sure what Stampin' Up! intended these little dies to be but I immediately saw argyle. Weaving the Faux Suede trim through wasn't has hard as it looks and the argyles stay in place without any adhesive.

Happy Father's Day to all the wonderful Dad's out there and to those who have stepped up to act as fathers. You have made families and the world a better place.

Feel free to message me with any questions about our Stampin' Up! products or this card and let me know if you want to be added to my monthly email newsletter. You can also find and follow me on Instagram and Facebook.

We'll see you next time. Thank for coming by.

Cheers,

Adrienne

No man stands taller than when he stoops to help a child.  -Abraham Lincoln

Saturday 18 June 2022

New Horizon Suite Collection

Hello Everyone and Welcome!

The New Horizon Suite was perhaps my most favourite set from the Jan-Jun Mini. Oh my gosh, the DSP is insanely gorgeous! However, everything from this suite retires June 30th. 

Can we talk about this gorgeous DSP again? These papers tell a story - they feel magical. You can create lovely cards so easily. Here are just a few of the cards I made with this fabulous suite.

I created this duo from one piece of DSP! The birds and sentiments were stamped right onto the DSP. I added the fence on one and the DSP grass on the other. So easy! These cards went on to become part a box of note cards for a friend.

This card was created for a neighbour, across the street, who was going through a hard time. I simply stamped the birds directly onto the DSP, added the deer (also in DSP because I didn't want it to stick out too much, using the Grove Dies) and added a sentiment (from Charming Sentiments Bundle). 

My daughter had bought an acreage in the mountains on the mainland and was feeling a bit overwhelmed with all the work. I made my her this card to cheer her up. She absolutely loved it. The sweet birds (fussy cut) and sentiment (Double Oval Punch) come from the Catch You Later, which also retires on June 30th. After finally seeing her place this summer, this DSP is an incredible reflection of her land and views.


I made this card for a fellow Demonstrator, whose Dad passed away. We met when she attended one of my online stamp camps earlier this year. After chatting, we discovered not only had we briefly worked together, but her Dad and I had worked together for many years - small world. To make this card, I just glued the die cut fence to the front and wrapped the ribbon around the corners, taping it to the back. The sentiment came from the now retired, Here for You dies. 

This one actually came into being when I was creating cards for my Happiness Abounds Mini Stamp Camp. I wanted everyone to see the versatility all the dies in that set, including this funky one. Now, I figure it was designed as a decorative border die but I decided to have some fun with it so I crisscrossed the ribbons (taping them to the back). The flowers come from the Happiness Abounds stamp set and the sentiment from the Flowers of Friendship Stamp Set. Even the reverse sides of the DSP in the New Horizon set are amazing.

You won't want to miss out this beautiful and versatile set - remember, it retires June 30th.

If you have any questions about Stampin' Up! products or any of these projects, please message me. Let me know if you want to be added to my monthly email newsletter. You can also find me on Instagram and Facebook.

See you next time. Thank you for taking the time to visit.

Cheers,

Adrienne

Look to the horizon, spread your wings, and fly - Tom Reilly