Saturday, 29 May 2021

Window Sheet Card

Hello Fabulous Creators!

Welcome back to my blog. This week we're making a fun fold that doesn't involve much folding at all.  I used the Brew Some Fun set. For those of you who don't know me, I am a crazy latte lover and simply had to have this one!

Start with a Granny Apple Green Cardstock piece, measuring 4 1/4" x 11". You'll also need a couple scraps, one cut to 1 3/4" x 4 1/4" and another for the matte behind the top sentiment. The Basic White Cardstock piece is 4" x 5 1/4". Again, you'll need some scrap pieces for the sentiments and the coffee cup. Trim two pieces of Pattern Party (special Host) DSP to 4" x 1 1/2". Finally, cut a piece of Window Sheet to 3" x 4 1/4". Score your cardbase at 5 1/2" and then cut it, after the score, at 7 1/4". Cut the remaining piece into two 1 3/4" x 4 1/4" strips. You should have a scrap 1/4" strip left.  

For the assembly, run a strip of Stampin' Seal along the edge of the 1 3/4" side of your cardbase (on the inside.) Keep your base flat for now, with the adhesive facing up. Line your Window Sheet up on the card base, making sure there is enough at the bottom. Place one of the 1 3/4" strips at the bottom and finish positioning the Window Sheet. Fold the short piece of the cardbase down onto the Window Sheet. Repeat this process with the 1 3/4" strip. Line up bottom with the bottom edge of the card. The two remaining strips go on the inside of the card to cover up the Window Sheet edges. 

I used my Bermuda Bay, Flirty Flamingo and Granny Apple Green Stampin' Write Markers to colour the party hats on the stamp. Tip: be sure to huff (breathe on) the stamp before stamping with it. The greetings and coffee cup were stamped in my Bermuda Bay Classic Stampin Pad. With your Paper Snips, cut out he cup. Using your Layering Circle Dies, cut out the first greeting and a mat. The second greeting was cut out with the Stitched Rectangle Dies. All 3 items were attached using Stampin' Dimensionals. For fun, I added 3 of the circles from the Silver & Clear Epoxy Essentials.

On orders under 200, be sure to use the host code. It's found to the right of this post. May is an amazing time to HOST or JOIN. Until June 14, 2021 when you host a party (or just shop), at the 300 mark, in addition to your 10% in Stampin' Rewards, you get another 30 to spend! From now until May 31, 2021, when you join from anywhere in Canada, you get to choose 206 worth of product for only 135. And shipping is included! Message me for more info.

To stay up to day and see what I'm making, follow me on Facebook and Instagram and subscribe to my Youtube Channel. See you next Saturday.

Cheers,

Adrienne

Saturday, 22 May 2021

Seashore Stampers May Blog Hop

Hello Everyone! 

Welcome back to the Seashore Stampers Monthly Blog Hop. This month, it's all about the Dads (or a masculine card/project.)

 With my Dad in mind, I created this card using the Seascape Bundle. He absolutely loved fish an had various aquariums going throughout my childhood. Sharing a love of music, my Dad and I were very close and I still miss him terribly. I'm glad he got to live on Vancouver Island for his last years. It was the perfect place for him. This one's for you, Dad!

The technique used in this card is similar to my Valentine's Blog and Youtube so I'm not going to get into a lot of detail. The main difference is that I used a larger front piece to create the curve. It measures approx 5 3/4" wide x 5 1/2" high. The Layering Diorama was used to cut out the front piece. Both that piece and the card base were then embossed with the Seashells 3D Embossing Folder.  Be sure to centre the embossing folder on the loose piece - you only want the middle embossed. I scored the embossed front piece at 3/8" & 3/4"  on each short side. After positioning your fish, attach a strip of copy paper over the glue dots. I also cut out little squares of copy paper for the back of the fish, again to cover up the glue dots. The fish were cut out from our Ombre Specialty Paper. Bermuda Bay, Calypso Coral and Coastal Cabana Cardstock was what I used on the rest of the card. The seashells were painted with shimmer paint. If you have any questions while, please let me know. I'm here to help.

The "Dad" sentiment comes from May's Paper Pumpkin, which was baseball themed. Speaking of Paper Pumpkin, next months couldn't be more different from this month's. While it's a stand alone kit, it coordinates with the Expressions in Ink Suite. I'm so excited to see it. Even for experienced card makers, Paper Pumpkins are great to create a bunch of cards in a hurry. With the Suite, you can kick things up a notch. And if you're new to stamping, they are perfect for you. The kit includes EVERYTHING you need to make 9 gorgeous cards.

https://su-media.s3.amazonaws.com/media/Promotions/2021/PP-June-2021/banner/06.01.21_FACEBOOK_COVER_JUNE_PP_NA.jpg

With two specials going on, May is an amazing time to HOST or JOIN. Until June 14, 2021 when you host a party (or just shop), at the 300 mark, in addition to your 10% in Stampin' Rewards, you get another 30 to spend! From now until May 31, 2021, when you join from anywhere in Canada, you get to choose 206 worth of product for only 135. And shipping is included! Message me for more info.

Be sure to visit the other blogs. See you next Saturday.

Cheers,

Adrienne


Monday, 17 May 2021

Polished Stone Technique

Hi Everyone,

My apologies for the delay in getting this up. I did post a Youtube video last week but like to have written instruction for those who are hard of hearing and can't access the captions. (Also, some people just do better with stuff in writing.)

Meet the polished stone technique. What I love the most about this process is that it can be an intentional or random as you like. The hardest thing about this technique is covering it up! This is why I chose to put this stunning die on top of it and didn't add a greeting. It comes from the Sealife Dies.


You'll need our Vellum Cardstock, Stampin' Blends (alcohol markers) and preferably 99% Isopropyl Alcohol for this technique. Down the road, if you want to attach it to a piece of Basic White Cardstock, (before putting it onto coloured cardstock) use an Adhesive Sheet.

This technique does work best with dark or vibrant colours. You can go for a monochromatic look with just a pair of blends or add a contrasting colour for the "veins." For the colouring, in my example, I used both Bermuda Bay Blends and the dark Melon Mambo Blends.

Since it will show up the most, I start with my darkest colour. Using the wide tip, and at a slight angle, scribble some random blobs onto your piece of vellum. Next, using the lighter blends from the same set and do more blobs. Finally, if your using a contrasting colour, fill in all the spaces. Be careful not to go over the other colours, or they will blend. 

PHOTO(s) illustrating technique coming soon 

Put a small amount of the alcohol into a container. If there is a lot of alcohol on the brush, it will make a larger "stone." If you have little alcohol on the brush and barely touch the paper, you will get tiny looking pebbles. Using an Aquabrush, with a pointed tip, dip into the alcohol and touch the paper (don't use the bulb.) Without redipping it, touch the paper again and again, in different spots. Redip as needed or desired. Continue this until you are happy with the results. If you don't like it or the stones are too large, wait for it to dry and reapply the blends where needed. Have fun with it. Message me with any comments or questions.

Remember we have some AMAZING specials this month. Host an event (or just shop) with a 300 spend and in addition to your 10% rewards, you get an extra 30 dollars for shopping. Now if you're spending that much, I wound be remiss if I didn't tell you about our JOINING special. It's still only 135 (with FREE SHIPPING) but you get to choose 206 worth of product! No matter where you are in Canada, you can partake!

For all your card making and papercrafting needs, visit my store.

Be sure to come back on Saturday for the Seashore Stampers Monthly Blog Hop.

Cheers,

Adrienne


Saturday, 8 May 2021

Welcome to May

Hello Everyone!

Welcome to May. It is a crazy fun month in the Stampin' Up! world - there is a LOT going on. 

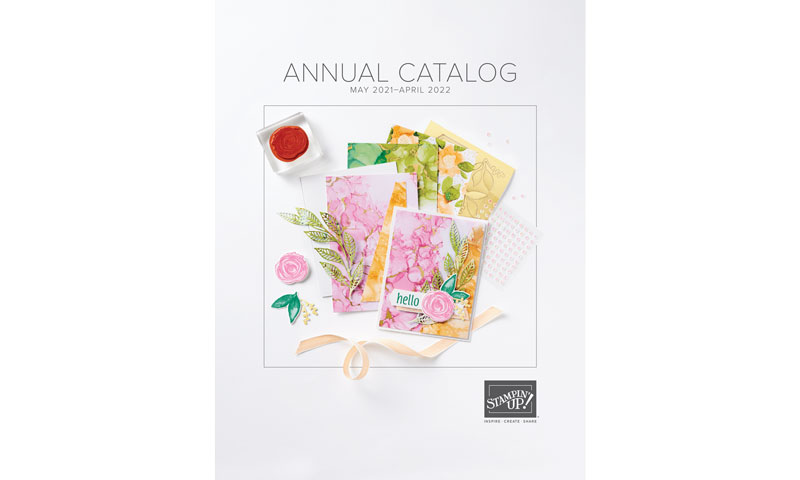
First and foremost, our fabulous new Annual Catalogue went live. There are so many fabulous new products in there. Click on the catalogue to check out my shop. If you want a hard copy, message me to get yours.

04.01.21_TH_SHAREABLE_AC_CATALOG_NA

Between now and June 14, 2021, when you spend 300 or host a party with 300 in sales, (and this can be done virtually) in addition to the 10 % in Stampin' Rewards, you get an extra 30 to spend. More stuff for you!

Connect, Craft & Collect

Now is an incredible time to join! It's still only 135 and you get to choose 206 worth of product, with FREE SHIPPING. You'll become part of an incredible community of crafty sisters (and a few brothers too). And you'll get a 20% minimum discount on all future purchases as long as you remain active.*

https://su-media.s3.amazonaws.com/media/Promotions/2021/05_JOIN-Promotion/square-1/5.01.21_SOCIAL1_MAYSTARTERKIT_EN.jpg

Batter up! If you're a lover of baseball, new to stamping, wanting to make some cards quickly or looking for something to do with the kids/grandkids, this kit is perfect. It makes 9 cards, 3 of 3 different designs and includes MLB chewing gum. It's only SEVEN DOLLARS to new monthly subscribers. The Paper Pumpkin is a subscription kit and a box of happy goodness will show up on your doorstep once a month. The additional kits are 30. You can cancel at anytime. Click on the image or go to my store, select "Specials" and then scroll down to Batter Up! This offer is only violable from May 7-10th, 2021 or while supplies last.

https://su-media.s3.amazonaws.com/media/Promotions/2021/PP-May-2021/SUBSCRIBE-A-THON_BATTER_UP.jpg

And last but not least, my annual yard sale is this weekend. To ensure compliance with health restrictions,  it's by appointment only. I still have some early afternoon spots open. Contact me to book yours!

See you next week.

Cheers,

Adrienne