Monday 27 August 2018
Friday 24 August 2018
Seashore Stampers August Blog Hop - The Holiday Catalogue!
Welcome back to the Seashore Stampers monthly blog hop. This month we are featuring our creations from the fabulous new Holiday Catalogue! With so much to choose from, and a wickedly large pre-order staring up at me from my craft table, it was a tough decision. If I make cards everyday from now until Christmas, I don't think I am going to run out of ideas.
Meet my Dashing Deer card! In addition to featuring a brand new stamp set and thinlits, I did a fun fold. (Fun for who, you ask? It's not as challenging as it looks. I'll try to walk you through it and if you have any questions, I am always here.)
Cut your 8 1/2" x 11" base cardstock in half vertically. You should have two 4 1/4" x 11" pieces. I used the Very Vanilla Thick Cardstock as it provides much more support than regular cardstock.
At the other end score at 1" and 2" but only 1" deep on each side (in, towards the centre of the card.)
This shows how your card will look from the side. (You may want to make an extra one of these just to play with.)
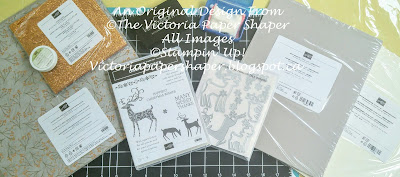
Cut 2 strips of Designer Series Paper (DSP) measuring 4 3/8" x 7/8". I used the Joyous Noel Specialty DSP, which I must say is one of the prettiest holiday DSPs I've ever seen in a long time.
Cut a 4 1/8" x 7/8" piece of coordinating cardstock for your greeting.* I used the Gray Granite Cardstock. Wipe it with your Embossing Buddy, stamp your greeting with VersaMark and heat emboss it. My card features the Copper Embossing Powder.
Select the appropriate die cut and paper for your dashing deer, featured in the centre of the card. Mine is from the Joyous Noel Glimmer Paper which you can find in the new Holiday Catalogue. This paper is amazing! Going through the Big Shot, it cuts very easily - gone are the days of peeling off a waxy back. And, get this, I managed to cut out FIVE deer from a single 6 x 6 piece of paper, along with about 15 tiny flowers. (I made this card for a holiday swap.) One of the fabulous bonuses of these thinlits is you get several flowers so you can cut out more than one at a time. Woo hoo! Thank you Stampin' Up!
I used Multipurpose Liquid Glue as my primary adhesive, with Stampin' Dimensionals under the deer. Make sure you don't have any adhesive under the bits of the deer that are going to hang over the edge. Mini Glue Dots were used to attach the adorable flowers.
All the supplies can be found in my shop. Simply click the shop now button. If you prefer to place an order with me directly, drop me a line.
Until next time,
Adrienne
*Measure once. Cut twice. I mismeasured the front trim and cut my piece about 1/4" too short...for the entire swap! So, do as I say, not as I do. Measure twice, cut once. It's far more economical and way less frustrating.
Enjoy visiting everyone's blogs!
Tuesday 14 August 2018
TERRIFIC TUESDAY!!!
Today isn't just any Tuesday. It is the opening registration date for the 30th Anniversary Stampin' Up! On Stage in Orlando. I'm in! And so are all my girlfriends. A gaggle of us (10) will be traveling from the Victoria area for this great adventure. From complete newbies to seasoned stampers, from Bronze to Gold Demonstrators, it is going to be an amazing time. Our team has rented a condo and are going to have some scrapbook worthy fun! (What happens in Orlando stays in Orlando? Well, um...sure. Except for the photos.)
In order to help celebrate this fabulous day, I'm posting some photos of my favourite original creations, along with some new ones. If you want any of the recipes, I am happy to share and you can reach me here. For all your stamping supplies, my shop is here. On orders less than 200, remember to use this month's hostess code MJCZJDZK.
Join my team now and come with us on our next great adventure!
Subscribe to:
Posts (Atom)


