Wednesday 28 August 2019

Thinking of You


Hello all,

I was going to post my first Christmas card this week (gasp.) However, at an area meeting this weekend, I found out there was a fellow demonstrator in need of a card. I don't personally know her, but she is apparently going through a lot right now.

We've all had moments in our lives where there is just too much happening. It can be a bunch of small things or something huge. Our lives can turn on a dime and it's just nice to know people are out there thinking of you.


This is a fairly quick card to make (about 5 minutes if you have all your supplies handy.) The base of this card is Soft Suede, cut at 8 1/2" x 5 1/2", scored down the middle at 4 1/4". The second layer is Sahara Sand and measures 4" x 5".

The 3 1/2" x 4 1/2" piece of Whisper White was run through the Brick & Mortar 3D Embossing Folder. With Soft Suede, sponge the inside back of the folder (the side that doesn't have the big Stampin' Up logo on it.) Place the Whisper White piece on the sponged ink and run it through your Big Shot.


By sponging this particular side, it highlights the bricks and leaves the mortar white.  I think the effect is brilliant!


The stamp, "Thinking of You" comes from the Rooted in Nature set and was stamped in Soft Suede. Use the 2nd largest oval from the Stitched Shapes Dies.


The fun ribbon is our Leaf Ribbon. I cut a couple 5 1/4"  strips and taped the ends to to the back of the card. Once that's done, using your Multipurpose Liquid Glue, attach the embossed piece with the ribbons to the Sahara Sand. Then attach this to your card base with your Snail or Multipurpose Liquid Glue. Finally attach the greeting with Dimensionals.

My shop is here. As long as you live somewhere in Canada, you can order from me. If your order is less than 100, please use the current host code. It's found to the right of this post underneath the picture of the catalogue. If your order is around the 100 mark, now is the time to Join the Fun. For 135 dollars, you can choose 205 worth of Stampin' Up! product. Whether you're a Beginner, Casual or Avid stamper, this is an incredible deal (which expires August 31, 2019.)

Contact me if you have any questions. 

Cheers,
Adrienne

Wednesday 21 August 2019

This Little Piggy is Out of Control!

Hello all,

I made with card for my dear friend, Brenda, who was celebrating her 60th birthday. Now you might be looking at this card wondering, "Why pigs?" Well, in the Chinese Calendar, this is the year of the pig and she was born in the year of the pig, so it's particularly auspicious. Since her recent retirement she's been traveling the world, with a little stuffed pig. Her Facebook page is full of photos of her and her little piggy and other piggies, in foreign countries. So now pigs are clearly a thing. The inspiration for this card came from a demo I did a swap with at our last convention. Unfortunately I don't remember her name.
生日快樂


To create this card, I used the This Little Piggy stamp set and the grass is courtesy of the High Tide stamp set. The greetings come from the Well Said stamp set & Well Written dies.

The card base is in Early Espresso 4 1/4" x 11". It's scored in the middle at 5 1/2". Then on the front, scored at 2 3/4". Burnish at the score lines.

Cut 4 Whisper White pieces 2 @ 2 1/2" x 4" and 2 @ 4" x 5 1/4" for the card. (One of large pieces will be on the back where you can write your personal message.) To construct the pig's box you'll need to cut 2 @ 1 5/8" x 5" and 1 @ 3/4" x 3 5/8" from your Whisper White.

Take the 3 box pieces and score the 2 matching ones (in landscape position) at 1 5/8" on one end and then 1/4" at the end. For the tiny piece, score 1/4" at each short end. Trim the corner ends off the 1/4" sides to make tabs. Burnish all score lines. Using your Stamping Sponges, lightly sponge some Early Espresso Classic Stampin' Pad onto the inside top of the Pinewood Plank 3D embossing folder. (Tip: The top is the side with the Stampin' Up! written on it.) Place your pieces into the folder, making sure you have the wood grain going in the direction you want. Carefully close the folder and run it through your Big Shot.


I used the Multipurpose Liquid Glue to assemble the box, first attaching one end to the other and then gluing the little piece in the middle. Fold the box flat to glue the final tab. (Tip: Make sure you have the inked sides facing you. You don't want to accidentally attach the inked side to the card. Also, I like to make sure seams are facing away from me. This gives the project a more polished look.)


The little piggies were all stamped in black Memento Ink, on Whisper White, and coloured with the Blends. I used the Petal Pink Set & Calypso Coral Set. All the piggies were fussy cut. This is a labour of love. I didn't want the wings so I just trimmed them off. Ditto for the flower.


Next, take your 3 pieces of Whisper White and stamp clouds with your Pool Party Classic Stampin' Pad. Make sure to stamp clouds before attaching the grass.

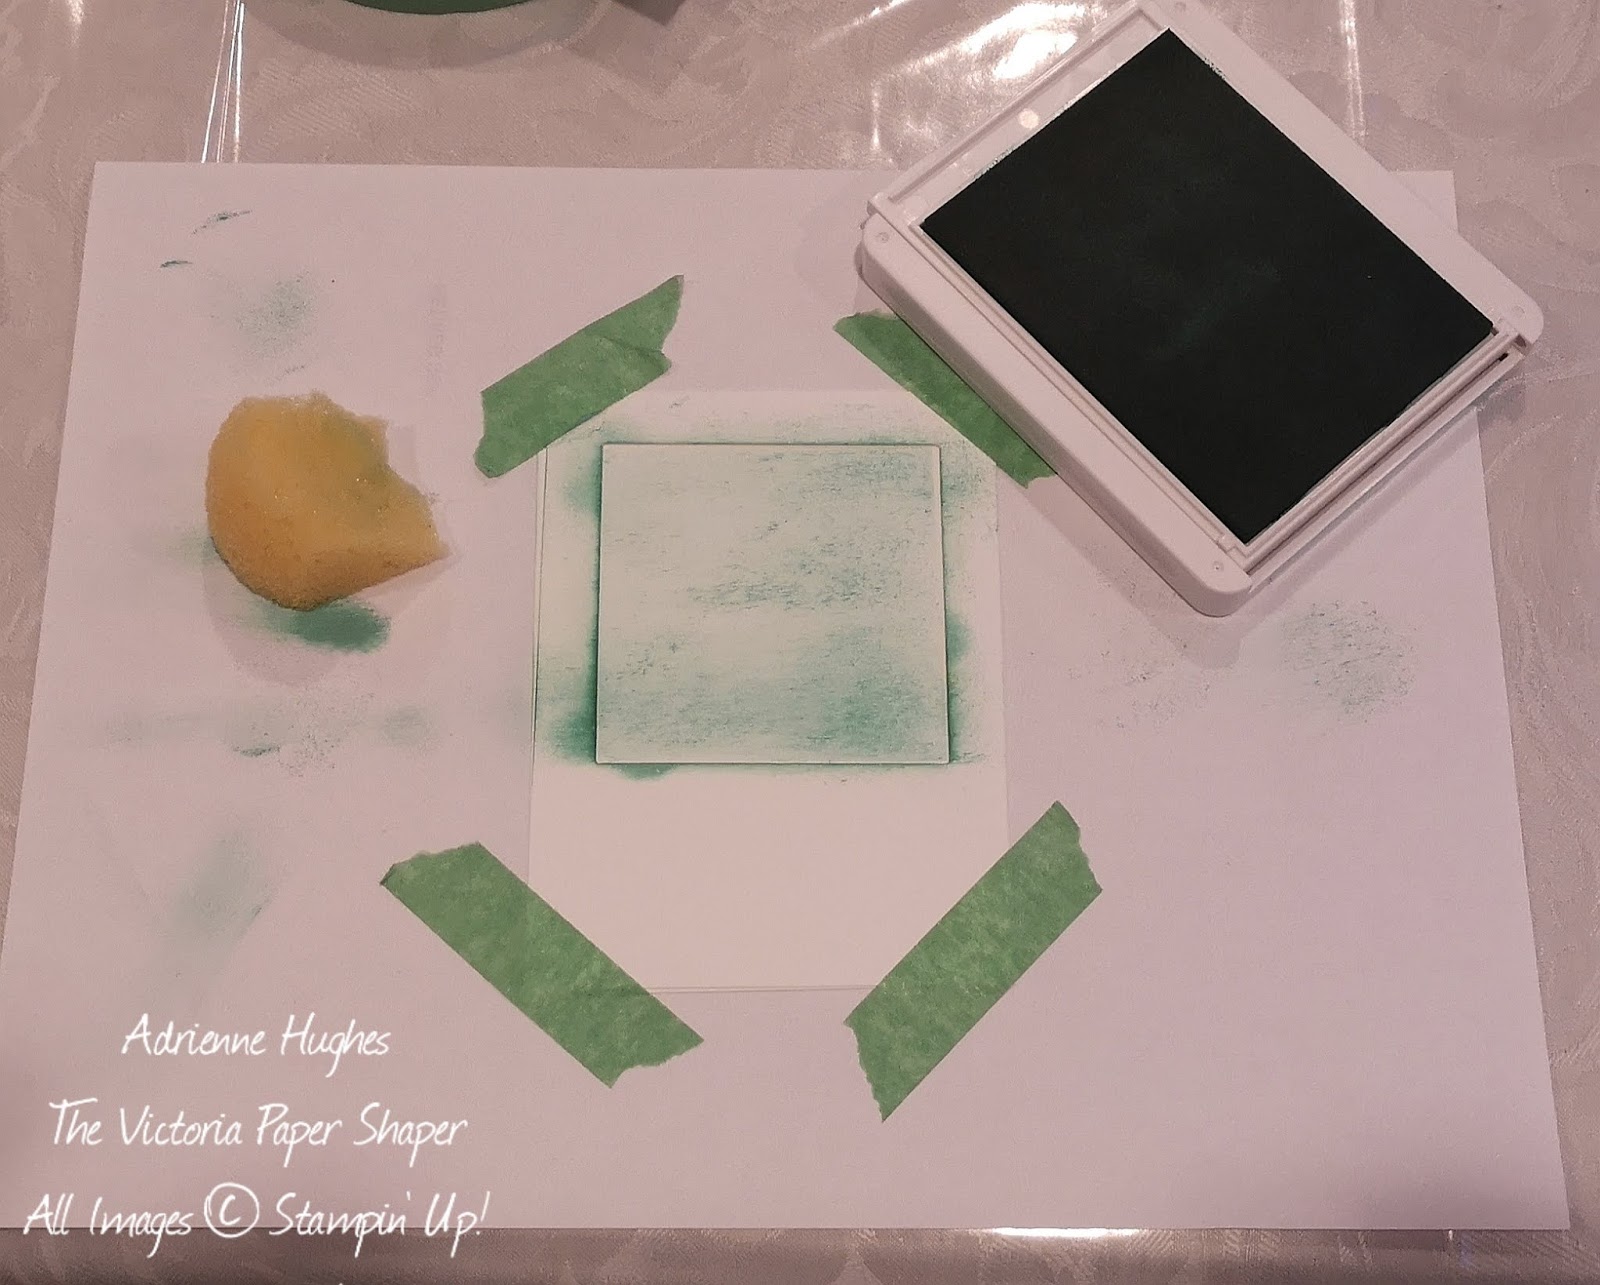
The grass in the rear is Old Olive and in the front it's Granny Apple Green. Using the two grass stamps from High Tides, I stamped with the Pear Pizazz Classic Stampin' Pad. Granny Apple Green was too Vibrant, Old Olive too dark and Versa Mark to light. There is often a process of trial and error - and it's just a matter of personal taste. The grass layers were just randomly cut in a hilly shape. The two layers, for the middle and end of the card, are attached to each other with Multipurpose Liquid Glue. (Tip: When you're attaching something that needs to line up, this glue gives you a moment or two to adjust it before drying.) Attach these grass pieces to the cloud stamped Whisper White. Attach only the rear part of the grass to the front left side of the card. Put aside the final front (Granny Apple Green) piece, which will be attached later. 


To attach the box, flatten and apply Multipurpose Liquid Glue to the plain white side and back. Align it with the bottom of the grassy piece, in the middle corner.


The front piggy is attached with Mini Dimensionals and then front glass with regular Dimensionals. All the other piggies were penned in with Multipurpose Liquid Glue. (Save the standing piggy until the end.)

Cut out the "Happy," in Calypso Coral, from the Well Written Dies. Stamp the "Birthday," in the Calypso Coral Classic Stampin' Pad from the Well Said Stamp Set. The Birthday greeting was punched out with the Classic Label punch, along with a piece in Calypso Coral. To add the border, snip the Calypso Coral piece in the middle and attach it behind the greeting. The sign stick was 2 1/2" x 1/16". For a piece this small I just trimmed the very edge off a straight piece of scrap and then shortened the scrap to 2 1/2". Using the Multipurpose Liquid Glue, I attached the sign to the standing piggy before attaching the piggy to the card.

Since this card had so much dimension, rather than squeezing it into a standard envelope, I made one from a piece of retired Designer Series Paper.


My shop is here. As long as you're anywhere in Canada, you can order from me. If your order is less than 100, please use the current host code. This will enter you into my monthly draw for a fabulous prize!* It's found to the right of this post underneath the picture of the catalogue. Now, if your order is around the 100 mark, this is the time to Join the Fun. For 135 dollars, you can choose 205 worth of Stampin' Up! product. Whether you're a Beginner, Casual or Avid stamper, this is an incredible deal (which expires August 31, 2019.) If you need help figuring out where to begin or have any questions, please contact me. I'm here to help!

Cheers,
Adrienne

Supplies:

This Little Piggy #151227; High Tide Stamp Set #143006; Well Said Stamp Set #148796; Well Written Dies #148534; Pinewood Plank 3D Embossing Folder #152320; Whisper White Cardstock #100730; Early Espresso Cardstock #119686; Old Olive Cardstock #100702; Granny Apple Green Cardstock #146990; Calypso Coral Cardstock #122925; Early Espresso Classic Stampin' Ink #147114, Pool Party Classic Stampin' Ink #147107; Pear Pizazz Classic Stampin' Ink #147104; Calypso Coral Classic Stampin' Ink #147101; Memento Pad #132708; Calypso Coral Blends Combo #144045; Petal Pink Blends Combo #147272; Classic Label Punch #141491; Basic Rhinestones #144220; and a piece of Designer Series Paper for the envelope.

*In order to comply with Federal Regulations, you must correctly answer a skill-testing question before being declared a winner. Odds of winning are dependent on the number of entries received. Without giving too much away, the prize is Stampin' Up! product.


Monday 19 August 2019

Seashore Stampers August Blog Hop - 3D Project


Hello fabulous creators,

Welcome to the Seashore Stampers August Blog Hop. This month, we are featuring 3D projects.

Although I have fun with the occasional 3D project, I spend WAY more time making cards. Tip: If this is your first time doing this project, try it on a piece of scrap paper first.

A couple weeks ago, for a class, I decided I wanted to give each guest a little thank you present. Well, here's what happened. I had ran short of the clean plastic envelopes I usually give my clients with their card pieces. After class, they would put their completed card back into the plastic envelope for safe keeping. I thought about grabbing each of them a baggie and then it struck me...I could make them each a little card holder. This way they have something to keep their cards in and they have a little gift from me. Woo hoo!


Well, 3 templates later, I think I figured out the measurements. I designed it to hold 2 cards on each side but depending on the depth of each card, it might hold more.


Start with an 8 1/2" x 11" piece of cardstock. I used Sahara Sand. Trim off 1/2" off one of the short ends. Your piece should now be 8 1/2" x 10 1/2". In landscape position, score from each short side at 5" and then score in portrait position at 6". Burnish alone all scorelines. Cut out the little 1/2 tab at the top.


Measure 1" in from each side of where the little tab used to be and make a small pencil mark on the paper. Trim from this mark down to the closest score line. You can use your scissors or paper trimmer.


Repeat this on the other side. Apply a piece of the Tear and Tape at each of the outside edges, close to the actual edge.


Since my class was seashore themed, I decorated them accordingly. I embossed a 4 1/4" x 5 1/4" piece Balmy Blue card stock with High Seas 3D Embossing Folder. Cut a 4 1/2" x 5 1/2" piece of Soft Suede. Optional Tip: As seen below, BEFORE attaching it, you can cut the Soft Suede oval you need in the next step from the centre of this piece.


The greeting, "Kindness Changes Everything" can be found in Abstract Impressions - it was stamped in Soft Suede and cut out with the Stitched Shapes Framelits. The greeting was attached to a Soft Suede oval from the Layered Ovals Dies. See my tip in the previous paragraph. Before attaching this to the card, I added a piece of the linen & white ribbon from the Magnolia Lane Ribbon Combo Pack.

The seaweed comes from the Smooth Sailing Dies, and is in Sahara Sand. The Vellum was punched out with the Sprig Punch. Add a few Basic Rhinestones, which are anything but basic, and you're done.

My shop is here. Regardless of where you live in Canada, you can order from me. If your order is less than 100, please use the current host code. This will enter you into my monthly draw for a fabulous prize!* It's found to the right of this post underneath the picture of the catalogue. Now, if your order is around the 100 mark, this is the time to Join the Fun. For 135 dollars, you can choose 205 worth of Stampin' Up! product. Whether you're a Beginner, Casual or Avid stamper, this is an incredible deal (which expires August 31, 2019.) If you need help figuring out where to begin or have any questions, please contact me. I'm here to help! 

Cheers,
Adrienne

https://stampingforu.blogspot.com/2019/08/seashore-stampers-blog-hop-3d-projects.html?fbclid=IwAR1jsVGt9TJUosN0uxE-AC2xwgbbINrWVhG5XqX14T0_bFDievczmOyB05g

https://frommetoyoupapercrafts.blogspot.com/2019/08/seashore-stampers-blog-hop-3d-themed.html?fbclid=IwAR3Z2Y36dz-uzGDkpU997_rRhmBSHshFbMDjBcN7TMDwMAUTzfEmt8FWy3I


Wednesday 14 August 2019

Seahorse Greetings

Hi all,

For this post I decided to feature the same card twice - one for the Beginner Stamper (the 2nd one) and one for the Avid Stamper (the top one.) The Casual Stamper falls somewhere in between and there are lots of options. I used the lovely Seaside Notions stamp set for this card.


As a Beginner Stamper, you doesn't usually have a lot of equipment. In fact, you may only have paper, stamps and ink - I know that's how it was for me for the first few years. This was the inspiration for my first card. There aren't any fancy papers, it doesn't need a Big Shot and there are no embellishments. The Avid Stamper usually goes all out. (And sometimes we go too far.) I will give instructions for the Beginner & Avid Stampers here. For the Casual Stamper, there is a lot you can do that falls between the two cards. It's up to you.

ALL: My card base is Bermuda Bay and measures 8 1/2" x 5 1/2". It is scored in the middle at the 4 1/4" mark. The coral was stamped onto a 4 1/8" x 5 3/8" piece of Whisper White in Calypso Coral, funnily enough.

BEGINNER: The shells are all stamped in Soft Suede. I stamped off to make the colour a little lighter. This means you put you stamp in your ink and then stamp it on a piece of scrap paper before stamping your image onto the card. Note: Stamping off is not only a fun technique but when you're starting out and only have a few colours of ink, it's a great way to diversify. Depending on the ink and the stamp, you can get 3-4 shades out of one colour. The greeting is in Soft Suede (not stamped off.)  The seahorse and bubbles are in Bermuda Bay. Once you've finished stamping, using your Snail, attach the Whisper White to the card base and you're done! #simplestamping

AVID: Run your coral stamped Whisper White piece through the Big Shot with the High Seas 3D Embossing Folder. (Make sure the waves are the right way up.)


Using Soft Suede and stamping off, stamp your shells on a piece of Whisper White scrap. For this card, I stamped the greeting on the inside, in Soft Suede as well (I didn't stamp off.) I coloured the shells with the Crumb Cake Blends. (I chose Crumb Cake over Soft Suede because it's lighter in colour and more sandy in appearance.) Fussy cut your shells and set them aside.

The seashore is stamped in Bermuda Bay on another scrap of Whisper White (look at us using up so many scraps!) I used the 2nd largest oval from the Stitched Shapes Dies to cut it out. Using the 3rd largest Layering Ovals Dies on a scrap of Bermuda Bay for the piece behind the seahorse. Use your Snail to adhere the seahorse to the scrap oval of Bermuda Bay.

Trim a piece of your Brights 6x6 Designer Series Paper to 4 1/8" x 5  3/8". I  used Bermuda Bay but you could use Calypso Coral (Subtle) or Soft Suede (Neutral) instead. With the Rectangle Stitched Dies (the 2nd largest) centre it over your Magnetic Platform on your Big Shot, to cut it out.
Using Multipurpose Liquid glue, attach your embossed Whisper White to the card base. With the Multipurpose Liquid Glue or the Tear & Tape attach your DSP frame. (Tip: Avoid using your snail on embossed surfaces.) Attach the seahorse piece with Dimensionals. I used Stampin' Dimensionals and Mini Glue Dots to attach the shells.


My shop is here. As long as you're in Canada, you can order from me. If your order is less than 100, please use the current host code. It's found to the right of this post underneath the picture of the catalogue. Now, if your order is around the 100 mark, this is the time to Join the Fun. For 135 dollars, you can choose 205 worth of Stampin' Up! product. Whether you're a Beginner, Casual or Avid stamper, this is an incredible deal (which expires August 31, 2019.) Contact me if you have any questions.

Until Next Time.

Cheers,
Adrienne

Supplies: Seaside Notions Stamp Set #149278; High Seas 3D Embossing Folder #149577; Whisper White Cardstock #100730; Bermuda Bay Cardstock #131197; Brights 6" x 6" DSP #149613; Bermuda Bay Classic Stampin' Pad #147096; Calypso Coral Classic Stampin' Pad #147101; Soft Suede Classic Stampin' Pad #147115; Crumb Cake Blends Combo #144601; Stitched Shaped  #145372, Layer Ovals  #141706; and Stitched Rectangles #148551 .


Wednesday 7 August 2019

With Gratitude

Hello fabulous card markers,

Welcome to my Wednesday morning blog!

My past few projects have been full of fussy cutting and I decided to do one that involved a lot more actual stamping for today. Vancouver Island, where I live, was my inspiration for this card. I am ridiculously grateful to be on this incredible slice of west coast heaven. Regardless of where you reside, this is a versatile thank you card. Other than tools and adhesives, all supplies will be listed at the end of this post.


Apart from the greeting, which is from the Seaside Notions, all the stamps come from the High Tide set. To start this card, I used a Sahara Sand base (8 1/2" x 5 1/2", scored half way at the 4 1/4" mark.) The next layers are Coastal Cabana  - one of my personal favourites (3 1/4" x 5") and Whisper White layer (3 1/2" x 4 3/4") You need two pieces this size.

Using the Layering Squares Dies (2 5/8" opening ) cut out a square from one of the Whisper White pieces.

Attach removable tape to the mask, taping it directly over the other piece of Whisper White. I chose to centre it near the top with a border slightly less than 1/2" on all 3 sides. With a Stampin' Sponge, sparingly spread the Coastal Cabana ink over the square. I also sponged around the out edge as well. Tips: If you are new to sponging, practice on a piece of  Whisper White cardstock before trying it on your card. Start lightly. Also, in order to make your sponge go further, trim it into little pieces, like a pie. (Note: I did try the Stampin' Dauber, but for this card I felt it put out too much ink.)


The gulls were stamped with Basic Grey. (I thought about black but decided it was too dark for this card.) The waves were done with the new Pretty Peacock ink. Since I was going for a more subdued look, I stamped off first. All the grass was stamped with Sahara Sand. And yes, the sand is Sahara Sand too, but stamped off. (Stamping off means you stamp on a piece of scrap before stamping on your project. It lightens the tone a bit.)

Since this card is being featured in two classes this week, with some new stampers, I used the Stamparatus for the greeting.  After testing it in different positions a few times, I neglected to ink the entire stamp. If you look closely, the "With" is a littler lighter. While this could be fixed with the Stamparatus, I decided I like the "gratitude" sticking out. This was done in Pretty Peacock. #happymistakes

The adorable Adirondack chair comes from the Seasonal Layers Dies. For my upcoming classes, I cut out a bunch of different Adirondack chairs, in Sahara Sand, Pretty Peacock, and Real Red. I'm excited to see what they all choose. The chair was attached with Stampin' Dimensionals cut into little strips.


 My shop is here for all your paper crafting needs. If your order is less than 100, please be sure to use the current host code. It's found to the right of this post underneath the picture of the catalogue. Now, if your order is already the 100 mark, this is the time to Join the Fun. For 135 dollars, you can choose 205 worth of Stampin' Up! product. Contact me if you have any questions.

Until next time.
Cheers,
Adrienne

Supply List: Hide Tide Stamp Set #143006; Seaside Notions #149278; Layering Squares Dies #141708; Whisper White Cardstock #100730; Sahara Sand Cardstock #121043; Coastal Cabana Cardstock #131297; Stampin' Sponges #141337; Coastal Cabana Classic Stampin' Pad #147097; Sahara Sand Classic Stampin' Pad #147117; Pretty Peacock Classic Stampin' Pad #150083; Basic Gray Classic Stampin' Pad #149165 and Seasonal Layers Dies #143751