Hello talented fellow stampers, dedicated followers, and my beloved random lurkers,
Summer is wedding season - take cover! This year, I've been very involved in creating a bespoke wedding card for a client who found me online. She is on the other side of this wonderful, vast country and we literally don't speak the same language (as a first language), so it's been challenging, but in a good way. Her taste is quite different from mine and this has forced me to step outside my box. She wanted a lot of lace which meant ordering the Delicate Lace Edgelits #147053, expecting to use them for her card and not much else. Boy was I wrong! I fell in love with them. There is SO much to do with them. Depending on the the rest of your card, they can be made to look simple, modern, traditional, or seriously ornate. These fabulous dies are carefully hidden at the back of the catalogue on page 217, in the middle of the top row. Since they don't coordinate with a specific stamp set, they are easily looked over. Here is what they look like.
Okay, down to business. For my blog hop card, I simply had to use one of the amazing, Delicate Lace Edgelits. The stamp set I turned to was the ever versatile Host Set, Hand Delivered. This stamp set delivers for just about every occasion possible. What's fun about this card design, is you can substitute any colour for the Bermuda Bay I chose this colour for a few reasons. I have a lot of it on hand and need to make a dozen more identical cards for a swap. It has coordinating Blends (alcohol markers.) And well, it's so close to the colour of happiness*, I couldn't resist. (The truth comes out.)
Remove the die from the paper, using the Big Shot Die Brush . Use your Paper-Piercing Tool to remove any leftover pieces. Repeat the same process on the other short end. This is what you should have now.
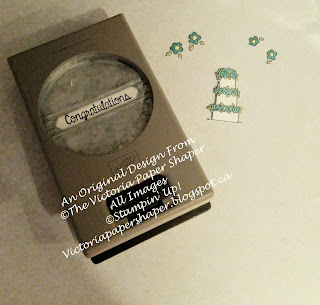
Stamp a wedding cake, a congratulations and two of the two flowers in Memento Tuxedo Black.
Now for the fun part - colouring! There is no real right or wrong here. I chose to colour only the flowers and leaves. Next use your Paper Snips to fussy cut the cake and two sets of flowers.
Punch out the greeting using the Classic Label Punch. Using your Big Shot and the 1 5/8" die from the Layering Squares Framelits cut out a square from a scrap of Bermuda Bay
Cut two pieces, approximately 5" each, from the 1/4" Bermuda Bay Mini Striped Ribbon. Seeking less white space, I elected to cover the stitched area of paper with my ribbon. I simply used "magic" cello tape, on the back of the lacy Whisper White Cardstock, to hold down each end. Do this at both lacy ends.
Finally, assembly begins! I used my Multipurpose Liquid Glue to attach the white lacy piece with the ribbons to the Bermuda Bay base. The Snail Adhesive was used to get the Bermuda Bay square onto the white lacy piece (at an angle, in a diamond shape.) Stampin' Dimensions raise the caked and greeting. The Multipurpose Liquid Glue was used to stick the smaller of the two flowers at each end of the greeting. I put one of the larger flowers on the inside and the other on the envelope. And voila, a super classy and distinctive wedding card.
Optional addition - I used Fine Tip Glue Pen on all the flowers because I love that raised shiny look. You could also use Wink of Stella. I do this at the very end as the glue takes a while to dry.
For all your supplies, visit my shop here.
If you have any questions, need more info, or just want to say hi, please contact me.
Cheers,
Adrienne
*If Bermuda Bay and Coastal Cabana had a baby, it would be the colour of happiness. One day, I'll tell my story about the colour of happiness came to be.


